Archive | Bread RSS feed for this section

Happy Fourth of July!

2 Jul

I’ve been so busy between volunteering as a Teacher’s Assistant for a week at my old school, then starting my Nutrition class at Skyline College, and interning at the Chinese Hospital to publish their annual newsletter.

Whew.

I know my friends may think I’m crazy for doing all this during summer, but to be honest, I love to keep myself occupied. I enjoy lounging at home but it’s nice to have stuff to do, things to do, and people to see.

Because I’ve been so busy  I haven’t had time to update the blog. I’ve been meaning to update it with fabulous pictures of the restaurants I’ve been to so I finally did that in the first post of today. Haha. I go about a month with not a peep and suddenly two posts in a day. Look out!

Red, White, and Blue Berry Yogurt Cake

Inspired by Nicole Weston (Baking Bites).

With my new Android phone I’ve been able to receive tweets directly on my phone. I use my Twitter account basically to follow other bakers, bloggers, and food-related people/organizations like SF Food Carts (@sfcarts). One of those bakers is Nicole Weston (twitter alias: @bakingbites).

She tweeted “The perfect cake for 4th of July. Or any day in July, really. http://fb.me/E50y6aCr” on June 24th.

Nicole Weston's (aka Baking Bites) original Red, White, and Blue Berry Yogurt Cake. All credits to her. Delicious looking, ain't it?

Always wanting to bake for a holiday, I clicked on the link. When I saw her picture of the cake (shown above) and read the directions, I knew that the cake was within my ability.

“I can do that!” I remember thinking my mood suddenly lifting.

Adding the berries in

And that’s just what I did today. I baked that cake and made the frosting. I’m going to cut a slice for my dad so he can try it as well as cut more slices to share with Eric (my friend, buddy, and family friend). Of course, if I remember any other people who would like to have some, I would share with them too! That’s the best part of baking: sharing with others.

Please see Nicole’s site “Baking Bites” for the recipe.

Red, White, and Blue Berry Yogurt Cake

My version of Baking Bite's Red, White, and Blue Berry Yogurt Cake

Slice of Berry Cake 2

Slice of Berry Cake

Moist Banana Walnut Bread

Tartine's Banana Walnut Bread

Adding the toasted walnuts and sprinkle of (improvised) oatmeal

I can’t remember how many times I’ve posted a recipe for banana bread here. My go-to recipe for this has been from this random blog I found about two years ago, but I’ve found another favorite.

This recipe for banana bread is from San Francisco’s beloved bakery Tartine. I went here last year for my birthday and loved the experience. Luckily my mom anticipated my attachment to Tartine and gave me the cookbook right then there too.

I don’t think I’ve made anything from the cookbook until now because I was looking for another banana bread recipe for my mom’s coworker on his birthday.

This banana bread is rich with a tender crumb. It uses three bananas  – most recipes I’ve come across only use two – and real butter – not oil like most recipes. Oh, but this makes all the difference.

If you would like this recipe, please email me at: nell.notebook@yahoo.com

I would be happy to share this wonderful recipe with a fellow baker. :)

Tartine's Banana Walunut Bread

Finally, Happy 4th of July to you all!

A Reflection and Food Craving

28 Apr Bananas on Sourdough Toast

I’ve been on an Easter Break/Spring Break since last Friday. You probably couldn’t tell since I haven’t really posted much.

But as I’m sitting here with all my AP Government loose notes, open binder, electronic book opened (and the movie Tangled in a minimized screen), I started to think about what I do for fun.

This all came to my attention during a scholarship interview on Tuesday. The lady said, “So I see you’re taking a lot of AP classes; you play the violin; you volunteer; and you bake. But what do you do in your free time, you know, for fun?”

Pound Cake

My pound cake - How could baking not be fun?

And I basically smiled at her and said, “I have fun volunteering and baking so those two things are not ‘chores’ for me. But when I have the time, I love to check out different restaurants and bakeries with my mom.”

I’m not sure if she understood what food means to me though. I mean, sure a weeknight dinner is just a dinner, a 30-minute break where I scarf down the (delicious) food my mom makes before I hit the books again.

White Peaches

Aren't they beautiful? Would she see what I see?

But long weekends and holidays are absolutely beautiful. We wake up early to try a new breakfast place. (We tried to go to Mama’s Cafe in North Beach last Sunday, but it was way too busy.)

I’m not sure if that seemed exciting and fun to the lady, but I hope I came off as a good candidate.

Anyway, after thinking about my interview I got to thinking about how I wished I had time to bake. And then I looked at what I had been eating.

Breakfast? Fruits, slice of sourdough toast, and popcorn.

Now popcorn may sound strange, but I love popping my own popcorn in a pot at home. I don’t like butter or salt, but sometimes I’ll sprinkle some strange grated/powder cheese thing on it. It sounds gross, but it’s delicious.

I think I had two bowls of popcorn just today. I’m totally over doing it, I know, but having been without it for 40 days is hard. (My mom gave it up so I didn’t want to eat it around her.)

But here is perhaps the strangest thing I’ve eaten this week for breakfast: bananas on sourdough toast.

Bananas on Sourdough Toast

Bananas on Sourdough Toast - who knew the sourdough taste and its texture would complement the sweet soft banana slices?

I have no idea what inspired me to do this, but I woke up craving sliced ripe bananas on toast. Sometimes cravings are just cravings and the actual dish is disgusting, but let me tell you, it was just as good as I had imagined.

I know I dreamt something last night so if any idea “Inception” happened, then perhaps that’s why. Other than that, I have no clue how I got this idea.

I wonder… do you have anything “strange” that you eat/make/bake? Perhaps I’m not the only one of my kind… :)

Ciabatta Loaves and Bread Bowls

26 Feb

Last weekend I made two medium-sized Ciabatta loafs. (I tweeted about it actually.) And the timing was perfect too since my mom and I were going to visit her friends (a young couple with a baby) in San Jose.

As always when I have anything dealing with bread, I turned to my good ol’ reliable Peter Reinhart cookbook, artisan breads every day. Thumbing around the glossy pages I found the page where the Ciabatta recipe was, which actually wasn’t that hard since I had gotten flour into the crease of the book (something I hate doing). The other place where the cookbook naturally opens up is for Reinhart’s Cinnamon Buns. (Ah, those fall Saturdays with fresh cinnamon rolls are the best!)

Using my new handy dandy cookbook holder (thanks, mom!), I propped up the book and prepared the dough for its overnight fermentation on Friday.  Then on Saturday, I split the dough into two balls and let it rise for another hour.

I must admit that I was super excited when making the dough because I actually had King Author’s Bread Flour – the best stuff around. Not only that, but I used a scale to weigh all my ingredients so the ratios would be as close to perfect as possible. I did notice a difference in the dough too; it was stickier and softer than I remember, but Reinhart wrote that it would be like this so I was just careful when handling the dough.

Sticky Dough

Since I didn't have a picture of the sticky dough, I thought I'd draw a cartoon version of myself with the dough. :)

Oh, but the extra carefulness and preparation that went into these loaves were worth it. I’m not too sure how the texture of Ciabbatta bread should be, but check out the pictures and let me know what you think. I did notice one major difference between my loaves and Reinhart’s pictures: my loaves were slightly yellow due to the olive oil I used.

The Dinner Table

The table set with bamboo mats, chicken Parmesan, pear salad, and my ciabatta bread.

Ciabatta Bread Cut

The ciabatta bread all cut up and sitting pretty on a bread stone warmer.

Ciabatta bread slice

The end slice of the ciabatta bread. Is this the right texture?

I have to say that this being the second time I made this bread, I think I improved a lot. In the end the seemingly unimportant things (like a steam pan in the oven, weighing ingredients, and a bread warmer) makes all the difference in making a good loaf of bread.

Now, what kind of foodie would I be without mentioning yesterday?

“What’s yesterday?” you may be asking.

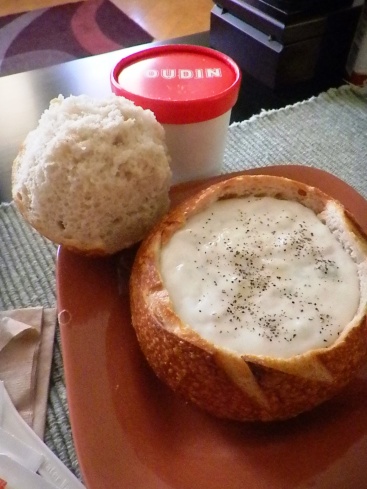
Well, it was National Clam Chowder Bread Bowl Day (according to Boudin). I have no idea if this “holiday” was created by Boudin, but when the email in my inbox said that on February 25th Boudin would be selling a buy-one-get-one-free deal for their famously delicious clam chowder bowls, I knew exactly what I’d be having for dinner.

When I arrived to my local Boudin 10 blocks away from my house, I had to wait in line behind a couple of people who all had the coupon printed out too. I felt bad for the cashier/counter employee since she was the only one there to get all our orders. You’d think Boudin would have anticipated that with such a deal, there’d be more customers and hence a need for more employees. Oh well.

Anyway, I didn’t mind the wait. I chatted with the other ladies in line. And then, it was my turn and I ordered the bread bowls, gave a polite “thank you!”, and was on my home.

Let’s just say Friday’s dinner was absolutely delicious especially on a cold winter day in February. :)

National Clam Chowder Bread Bowl Day - Boudin style

Lovin’ Mornings

13 Nov

I can’t even remember what I wrote in my last post … That’s a bad thing, I know. But I’ve got more updates on what I’ve been doing and baking lately!


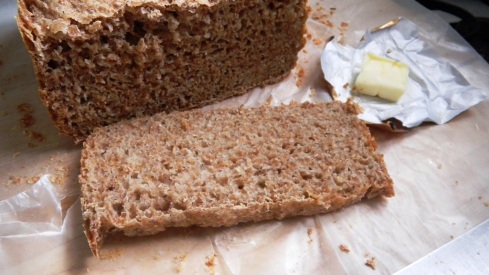
One thing I have learned is that non-expired yeast is ALWAYS better than expire yeast even if the expire yeast has just been expire for 2 weeks. Ick. Not only was this bread made out of expire yeast,  but I didn’t have enough flour so there went my idea for a simple white bread. To come out with 4 cups of flour, I used 2 cups of unbleached flour and 2 cups of oat bran flour. While reading the BreadMan instructions, I noticed that it said oat bran was used to “enhance the texture of the bread” and it made no mention of it being the main source of flour. But oh well, I was craving bread and since I was too lazy to buy any proper ingredients and hand-knead the dough, all the mixed-matched ingredients went into the BreadMan’s bucket and the BreadMan did the rest of the work.

Homemade Oat Bran BreadI don’t think that I hated the bread. It did have an awkward sour-ish taste – was it the yeast or oat bran? But the end result was edible and when toasted with butter was delicious. But let’s just say that I’m glad to have store-bought artisan bread again. :)

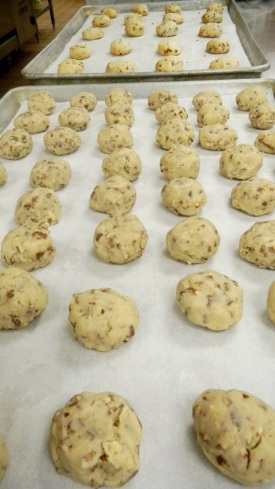
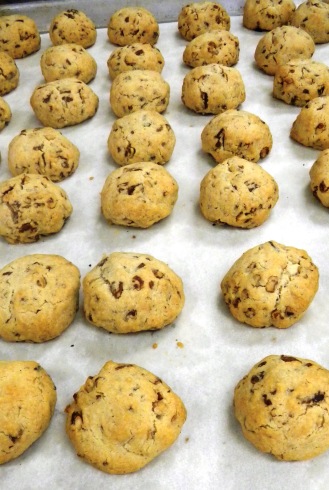
So today I went back to St. Anne’s to help out – okay, now I remember what I wrote about last time ^^ – and anyway, after I chopped the carrots, peeled the potatoes, diced the apples, and sprinkled lemon juice over the apples, I was able to make Mexican Wedding Cookies! I’ve never made these before so I don’t know if they turned out the way that they were supposed to, but I’m kind of proud of them! Check ’em out:

Raw Mexican CookiesMexican Cookies FinishedWhat do you think? Did they turn out well for a first-timer’s Mexican Cookies?

Anyway, I just love the weekends. It’s always great to relax and do whatever I like during the mornings. Have I mentioned that I really really enjoy mornings?

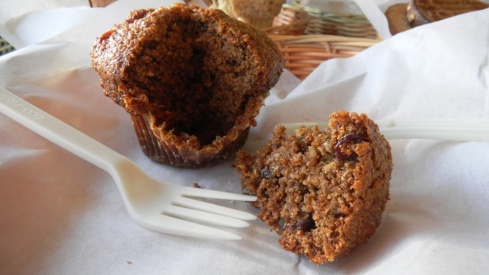
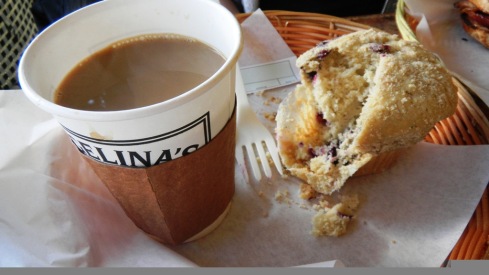
Cran Apple MuffinCoffee and Mixed Berry Muffin

Breakfast Means Waffles, Omelettes, and Cinnamon Rolls!

16 Jan

Nothing beats coming home after a hectic week at school even with all the love my friends show me. There’s just something about the good old familiar-ness of home: the smell as I walk through the door, the expected squeaks when I walk on the wood floors, the constant nagging meows coming from my tabby cat, and especially the much appreciated hug and smile I get from my mom. :)

The next morning after sleeping in my bed again is even better because I wake up to mom cooking us breakfast. I stroll into the kitchen with sleep eyes still and offer to help her so we end up working together.

This morning was really no different. As I awoke, I found my mom preparing us omelets, so I decided to bake some cinnamon rolls from the dough I had, and then make some waffles too. It truly is amazing how much our tiny apartment kitchen can handle. (and stove/oven for that matter too!) Because I do like you, readers, oh so much, I’ll post the recipes for the bacon-onion omelet my mom made. The cinnamon roll recipe can be found in my previous post here. The waffles were simply made from a store bought mix and made using the Big Boss Grill (an info-mercial I got from a friend). I prefer to skip the syrup and butter and spread strawberry yogurt on mine. Yumm! :P

Mother Nell’s Bacon Onion Omelet

An original recipe that is sure to make you smile. Healthier alternatives in orange brown front.

Ingredients

  • 3 large eggs (or about a cup of egg beaters or egg whites)
  • 1/4 diced red onion (white or yellow is fine too)
  • a splash of milk
  • 1/4 cup of vegetable oil
  • 4 slices of bacon, sliced into 1/4 in pieces (or turkey bacon)
  • 3 large white mushrooms, sliced
  • pepper, to taste
  • salt, to taste

Procedure

  1. In a large cup or bowl, whisk together the eggs and milk until thoroughly combined and fluffy. Set aside.
  2. Heat pan (we used a wok) with the vegetable oil on medium heat. Once the oil is hot (2 minutes later), add the onions first until they are slightly browned. Then add the bacon slices that are slices again in 1/4 inch pieces and the sliced mushrooms. Cook mixture until fragrant and bacon is slightly browned. Add pepper and salt to taste, and little more oil if the oil is all soaked up so that the egg will not stick to the pan.
  3. Pour in egg and milk mixture and turn the stove to low-medium heat. Cook until the egg firms up and the top has a shallow pool of uncooked egg, about 5-6 minutes. Keep a close watch.
  4. With your spatula, lift the sides so the egg does not burn. Then fold one side over the other side as if you were folding a piece of paper in half. Cook omelet until it is fully cooked with no leaking egg mixture; takes about 2-3 minutes.

I hope you enjoy the recipe. It is the same one that my mom made me today. :) As always I love to hear your comments, feedback, and photos so feel free to email or comment below!

Good Morning, New Year 2010! I’ve got Cinnamon Rolls :)

2 Jan

I am not sure how familiar you are with the Filipino tradition – is it really Filipino? I’m not too sure – in which you have to wear anything round and circles on New Year’s Eve, but my mom and I actually follow it. According to the wives’ tale, if you wear circles and surround yourself with your money and anything round especially grapes and eat noodles, then you’ll have luck and wealth the following year. So, us being the slightly superstitious people – not believers of witchcraft or the such, but rather humorous believers – we decided to wear crazy clothes with circles and polka dots, put random money bills in our pockets, ate Taiwanese noodles, and put out a big bowl of grapes on our dinning table.  We were such a sight.

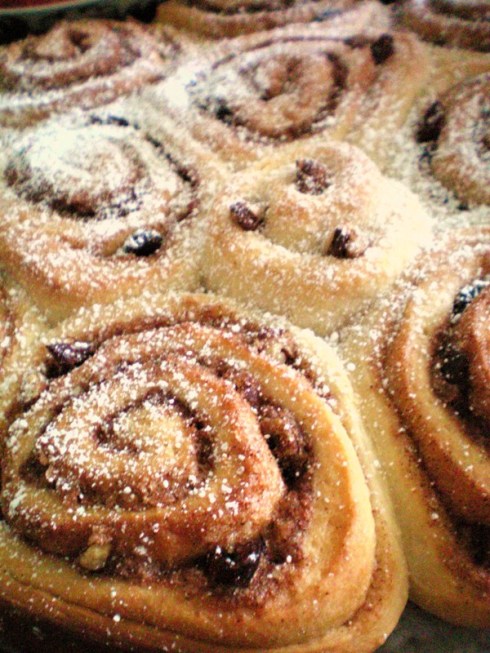
Anyway, I decided last night (New Years Day) to spend sometime with my newest best friends: my beautiful, brand new red KitchenAid Pro 600 and Peter Reinhart’s book Artisan Breads Every Day. (I’ll be writing about the KitchenAid mixer and Peter Reinhart in my next post). Together with my oven being all clean and spic-n-span, I was able to prepare the dough and shape it into cinnamon rolls. Beautiful, ROUND, cinnamon-y, cinnamon rolls! I decided to half the recipe in Reinhart’s book because 24 rolls for my mom and I would have been too much; as it is 12 was too much.

So this morning I baked the cinnamon rolls, and boy did the house smell good. Long gone was the awful cleaning smell from the oven. Nope, what wafted in tickling our noses were the twelve round cinnamon beauties.

They turned out fluffy and perfect tasting, not too much cinnamon with slight (oh, so slight) zing of lemon. I have to admit that I found the lemon extract ingredient to be strange, but it actually made the cinnamon rolls taste better and smell zingier.

Here’s the recipe because I know you’ll want to try it especially for your luck in 2010. :)

Peter Reinhart’s Cinnamon Rolls

Reinhart’s recipe is perfect for people working at home because it calls that you prep the dough the night before, then shape it the next morning, let it rise again, and then bake it. However, I decided to make the dough, let it rise 1 hr in a warm oven, shape it into rolls, and then place them in the fridge to rise again. The next morning I just baked them.

Makes 24 cinnamon rolls


Ingredients

Dough

  • 6 1/4 cups unbleached all-purpose flour
  • 2 teaspoons (tsp) salt, or 1 tsp coarse kosher salt
  • 6 tablespoons (tbl) sugar
  • 5 tbl instant yeast, or 6 1/4 tbl active dry yeast
  • 2 cups plus 2 tbl lukewarm milk, whole or low-fat (about 95 degrees F)
  • 1/2 cup vegetable oil or melted unsalted butter
  • zest of 1 lemon, or 1 tbl lemon extract, or 1/2 tsp lemon oil (optional, but highly suggested)

Cinnamon Sugar Inside

  • 3 tbl ground cinnamon
  • 3/4 cup sugar
  • melted butter or vegetable oil for brushing on dough
  • 1 cup raisins to taste (optional)
  • 1cup chopped walnuts or pecans to taste (optional)

Cream Cheese Topping

  • 4 ounces cream cheese
  • 1/4 cup melted, unsalted butter
  • 1 cup confectioner’s sugar. sifted
  • 1 tsp vanilla extract
  • 1/4 tsp lemon or orange extract, or 1 tbl lemon juice or orange juice
  • pinch of salt

White Fondant Glaze

  • 4 cups confectioners’ sugar, sifted
  • 2 tbl light corn syrup (optional)
  • 1 tsp vanilla, lemon, or orange extract, or 1 tbl orange juice concentrate (optional)
  • 1/2 to 3/4 cup milk or water

Procedure

Dough (Make the night before)

  1. Combine the flour, sugar, and salt in a bowl. Whisk the yeast into the milk until dissolved, about 5 minutes. Then pour yeast and milk mixture into the dry ingredients along with the oil and lemon zest. If using a mixer, use the paddle attachment and mix on lowest speed for 30 seconds to 1 minute. If mixing by hand, use a large spoon and stir for about 1 minute. The dough should form a soft, coarse ball.
  2. Switch to the dough hook and mix on medium-low speed, or continue mixing by hand, for  minutes, adding flour or milk as needed to create a smooth, soft, slightly sticky ball or dough. (Sticky dough is dough that sticks to a dry finger).
  3. Increase the speed to medium and mix for 2 minutes more or continue stirring for about 2 minutes more, until the dough is very soft, supple, and tacky but no longer sticky. (Taacky dough is dough that clings to a dry finger but will not stick to the finger when the finger is pulled away from the dough).
  4. Transfer the dough to a lightly floured work surface and knead for 1 minute, then form it into a ball.
  5. Place the dough in a clean, lightly oiled bowl large enough to hold the dough hen it doubles in size. Cover the bowl tightly with plastic wrap, and refrigerate overnight or for up to 4 days.

On Baking Day

  1. Remove the dough from the refrigerate about 3 hours before you plan to bake. Divide the dough in half and form each piece into a ball. Cover each ball with a bowl or plastic wrap and let rest for 20 minutes.
  2. On a floured work surface, roll each ball of dough into a 12 by 15-inch rectangle, rolling from the center to the corners and then rolling out to the sides. If the dough starts to resis or shrink back, let it rest for 1 minute, then continue rolling. The dough should be between 1/4 and 1/2 inch thick.
  3. Make cinnamon sugar by whisking the cinnamon into the sugar. Brush the surface of the dough with melted butter, ten sprinkle the cinnamon sugar over the surface, leaving a 1/4-inch border. Sprinkle the raisins or chopped nuts over the surface if you like, to taste. Roll up the dough like a rug, rolling from the bottom to the top, to form a tight log.
  4. Cut the log into 1-inch-thick slices and place them on a sheet pan or two round cake pans lined with parchment paper or a silicone mat, placing the rolls about 1 1/2 inches apart; they should touch each other once they rise. Mist the tops with spray oil and cover loosely with plastic wrap, then let rise at room temperature for about 2 hours, until the dough swells noticeably and the buns begin to expand into each other.
  5. About 15 minutes before baking, preheat the oven to 250 degrees F (177 degrees C).
  6. Bake for 10 minutes, then rotate the pan and bake for another 5 to 15 minutes, until the buns are a rich golden brown. Meanwhile, make whichever topping you prefer.
  7. Once the buns are glazed, enjoy!

Cream Cheese Frosting

  1. Combine the cream cheese, butter, and sugar in a mizing bowl. If using a mixer, use the paddle attachment and mix on the lowest speed fr 2 minutes. If mixing by hand, stir vigorously for 2 – 4 minutes. The ingredients should be evenly incorporated and smooth.
  2. Add the vanilla, lemon extract, and salt and mix on medium speed, or continue mixing by hand, for about 1 minute, until the ingredients form a smooth paste. Increase the speed to medium-high speed or stir more vigorously for about 20 seconds to fluff up the glaze. Once the buns have cooled for 5 minutes, use an offset spatula or table knige to spread on however much glaze you’d like. Stored in an airtight container in the refrigerator; any unused glaze will keep for up to 2 weeks.

White Fondant Glaze

  1. Stir the sugar, corn syrup, and vanilla together. Gradually whisk in the mill, adding just enough to make a thick but creamy glaze about the same thickness as pancake batter, adjusting with more liquid or sugar as needed. The thickness of the glaze is really up to you: the stiffer it is, the better it will hold its design; the thinner it is, the more easily it will spread. Ideally, you hould be able to drizzle a slow steady stream off the end of a spoon or other utensil to create designs that will firm up when the buns cool. Glaze the buns after they’ve cooled for about 5 minutes.


Me? I just like it with a bit of dusted sugar, strawberries, and butter. :) Enjoy!


From My Turkey Table to Your Christmas Table: Holiday Recipes

19 Dec

Phew! I finally have time to sit down and write to you guys! I know that it has been a while, and trust me I miss writing as much as I miss baking.

My Thanksgiving break only allowed a short fleeting moment for me to relax. I was basically in the kitchen baking like a mad woman. I had 1 apple pie, 4 pumpkin pies, 2 galettes, 1 apple strudel puff pastry, 1 large batch of FRESH dinner rolls and 1 batch of snickerdoodles to make. Our actual night-before Thanksgiving dinner only had 1 apple pie, 1 pumpkin pie, and one batch of fresh dinner rolls, but the rest for the family in Los Angeles. Mom and I decided to fly down and visit Lola (Filipino for “grandmother”). We hadn’t seen her in over a year! It was good to see her even though she was a bit sick.

Anyhow, the dessert that got rave reviews was my apple pie. My dad, who – if you knew him would know that – doesn’t eat more than one slice of any dessert let alone have his slice with ice cream, had 1 slice of pumpkin pie, tried a small piece of the apple pie, and actually went back for a large slice of apple pie and topped it with a huge chunk of vanilla ice cream! It was absolutely amazing! What was probably more amazing was that our tiny, tiny kitchen apartment and oven (the miniature kind) was able to accommodate all that food. I now deem my oven “the little oven that could”. It was working from 8 am to 6 pm.

Since I think my dad’s dessert miracle moment was astounding, I’ve decided to post up my all-American apple pie recipe that I got from my Caucasian friend’s grandmother who grew up in Idaho. This is about the most American thanksgiving I’ve ever had: homemade pies, mashed potatoes, FRESH dinner rolls, and stuffing! And since my friend, Michelle, decided that the rolls were her favorite, I’ll post the recipe up too. They turned out soft, fluffy, and tasty! I suggest that you use them for your Christmas dinner/party. They are sure to be a hit!

Grandmother’s All-American Apple Pie

Thanks to my friend’s grandmother and her ancient family cookbook

Ingredients

For one 9-inch Pie

  • Two 9-inch pie crusts (can be found in the freezer section of grocery, or make it yourself from this recipe)
  • 3/4 cup sugar (both white and brown will work)
  • 1/4 tablespoons all-purpose flour
  • 1/2 teaspoon ground nutmeg
  • 1/2 teaspoon ground cinnamon
  • Dash of salt
  • 6 cups thinly sliced pared tart apples or 6 medium apples (Green Granny Smith apples work best)
  • 2 tablespoons margarine or butter (if you use really sweet Fuji apples then omit this)
  • Aluminum foil
  • *For Dutch Apple Pie: 1/2 cup whipping cream
  • Procedure

    1. Preheat oven to 425.
    2. Mix sugar, flour, nutmeg, cinnamon, and salt. Stir in apples, coating each piece.
    3. Turn into pastry-lined pie plate. Dot with margarine/butter. If you have sweet Fuji apples, then you don’t need the butter.
    4. Cover with top crust that has slits cut in it; seal and flute. Cover edges with 3-inch strips of aluminum foil so that the edges of the crust won’t burn.
    5. Bake pie for about 30 minutes. Remove foil. Bake pie for another 15 minutes until crust is golden brown and juice begins to bubble through the slits in crust.
    6. *For a Dutch Apple Pie: Make extra large slits, take 5 minutes out of baking time; and before end of baking, pour 1/2 cup whipping cream through slits in top crust.
    7. Serve warm with vanilla ice cream or whipped cream! Enjoy!

    Dinner Roll

    Okay, so here’s the dinner roll recipe that I promised. This was my first time making them, but I was not disappointed! These turned out so soft and fluffy that I was so proud of myself. Just as a note, they spread out a lot when in the oven especially when they’ve risen well in a warm room.

    Grandmother’s Parker House Rolls

    By: Linda Larsen, About.com Guide

    “This recipe works best if you have a large stand mixer. If you don’t, go ahead and make it anyway. Just beat and beat the dough really well as you add the flour. Nobody will ever make these as light and fluffy as my Grandmother Matha did, but every year I try!”

    Prep Time: 45 minutes
    Cook Time: 20 minutes
    Makes: 24 rolls

    Ingredients

    • 1 cup whole milk
    • 2 pkg. active dry yeast
    • 1/2 cup butter, melted plus more for topping rolls
    • 1/4 tsp – 1 tsp salt
    • 1/4 cup white sugar
    • 2 eggs
    • 4.5 – 5 cups all-purpose flour

    Procedure

    1. Warm the milk in a small saucepan over low heat. Make sure the milk is not too hot or else this will kill the yeast. Mix 1/3 of the milk with the dry yeast in a small bowl and let sit until bubbly, about 15 minutes.
    2. In a large bowl, combine remaining milk, melted butter, salt and sugar and beat until the sugar is dissolved. Then add the beaten eggs and bubbly yeast.
    3. Add flour, 1/4 cup at a time, beating on high speed of stand mixer. This step should take at least 5 minutes. When the dough gets too stiff to beat, stir in rest of flour by hand, if necessary, to make a soft dough.
    4. Turn out onto floured surface and knead for 5 minutes, until smooth and satiny. Place dough in greased bowl, turning to grease top. Cover and let rise in warm place until light and doubled in size, about 1 hour. (I have also covered the dough well and placed it in the refrigerator overnight. This works really well. Let the dough stand at room temperature for 1 hour before proceeding with recipe.)
    5. Punch down the dough and roll out on floured surface to 1/2″ thickness. Cut with 3″ round cookie cutter. Brush each roll with melted butter. Place in 2 greased 13×9″ pans, cover, and let rise again until double, about 45 minutes. (If you refrigerated the dough, this will take longer, about 60-75 minutes.)
    6. Bake rolls at 350 degrees F for 20-25 minutes or until golden brown. Remove from pan immediately and brush with more melted butter. Don’t use the same butter you used when forming the rolls – melt some fresh just for this step.

    Mmkay, so now you’ve got both recipes. Both are very versatile: apple pie recipe can be used to make mini open-faced tartlets and dinner rolls can be shaped into knots and even put in brioche molds.

    Apple Pie Filing with Cranberries

    Mini Apple Tarlets

    Up-Close and Beautiful!

    Bon Appetite! :)

    Chocolate-Covered Almond Coffee Biscotti

    8 Nov
    Almond Biscotti

    Here's the whole gang straight from the oven! (Recipe Below)

    Alright, I’m totally rushing this post as I sit here in my pjs – sweatpants and a long t-shirt – with my glasses on. This is me right before I got to bed without any make-up or fixed hair. Bare with me on this because I just had to share this wonderful recipe.

    Last weekend when I made the pumpkin spice cupcakes, I bought two big 29-ounce cans of Libby’s  100% Pure Pumpkin. I hadn’t looked at the recipe (bad idea) and so I just figured that it was on sale and so I’d big the two big cans. Wrong, wrong, wrong on my part. Two small cans of 15 ounces would have been much smarter because I only used about 1/4 of the big can for the cupcakes and I was left with so much! I had to put it in a plastic tupperware and hope that it would save. Knowing my sporadic baking times, I wasn’t sure if I was going to get to it before it rotted. So, I decided to make something with pumpkin this weekend.

    Now, you may be thinking, “Okay, that’s a great pumpkin story, but how does this relate to your chocolate almond Coffee Biscotti?” And my answer is that well, it doesn’t…kind of… I was going to make a pumpkin biscotti but I couldn’t find any recipes. I knew that I had a recipe for cappuccino biscotti, almond biscotti, gingerbread biscotti (I am so trying this next weekend), and pistachio biscotti, but none for pumpkin; and to my dismay, I couldn’t find any online. I decided that I’d make a chocolate coated almond coffee biscotti instead and then just make pumpkin oatmeal cookies! (I haven’t baked them yet; the dough is still chilling so I’ll post up the recipe and photos as soon as I get to them :) ).

    I’m quite the undecided baker if you’ve ever actually seen me in the kitchen. I run around the kitchen gathering supplies as I go – a big “no no” when baking. The professional baker always prepares all the ingredients in separate bowls and containers and then mixes everything in the main bowl while having everything within an arm’s length. But not me. I don’t really have the time to do all that prep work nor do I want to wash out all those containers holding the ingredients when the ingredients already have nice, pretty boxes (yes, that’s me rationalizing my laziness!) So, I’m quite the mad woman in the kitchen. This time was not necessarily different though I always make sure to read the directions before starting the mad goose hunt.

    I have to say that I absolutely adore Stephanie Jaworski’s website: Joy of Baking. She does a wonderful job compiling recipes with captivating pictures.
    I always check her site first because I know that her recipes come from reliable resources. I do use other sites too once in a while; you can find those in the left sidebar.

    The Biscotti turned out absolutely wonderful not to mention it made the whole house – mom’s house – smell so good. My uncle came tonight and as soon as he walked in he said, “Hey! Someone’s baking again! Anything for me?” Unfortunately for him, I wasn’t done baking and had to actually stop baking the biscotti half-way. But, of course, I’ll be making him something soon. Anyhow, I decided to just bake the entire biscotti ‘log’ instead of spiting it into two logs like Stephanie says because the last time I made it, they turned out a little small to me. But when you make it, do whatever you like; experiment! The biscotti were a bit taller than the super skinny ones at the store, but who knows what kind of processing they undergo, y’know? They were so tasty, crunchy, and almond-y with a hint of coffee. Plus with the drizzled dark chocolate with powdered sugar on it, it was a bite of heaven!

    I have one photo, but more are coming soon. I have realized that when I take photos at night the photos don’t come out at well as during the day even though I have great big spotlights. Go figure so I’ll take some pictures in the morning. Plus, I took the pictures before I glazed them with chocolate – another one of my last minute decisions.

    Here’s the recipe since you’ve been so good and listened to me ramble and ramble. :)

    Chocolate Almond Biscotti

    Chocolate Almond Coffee Biscotti:
    A Morning Dessert for the Coffee Drinkers

    Adapted from Joy of Baking;
    Makes about 28 small-medium biscotti

    Ingredients:

    Almond Biscotti

    • 1 cup (145 grams) blanched whole almonds, toasted and coarsely chopped – I only used 1/2 cup so I doubled the almond extract
    • 1 tsp (5 grams) baking powder
    • 1/8 tsp salt
    • 2 cups (260 grams) all-purpose flour
    • 3/4 cup (150 grams) granulated white sugar
    • 3 large eggs
    • 1 tsp pure vanilla extract
    • 1/2 tsp pure almond extract – I doubled this to 1 tsp b/c I only had 1/2 cup of almonds available; still tastes good :)
    • 1 tsp instant coffee

    Chocolate Glaze

      3 ounces (85 grams) of semi-sweet or white chocolate1 teaspoon (5 grams) vegetable shortening

    I don’t have an exact recipe for this me being the experimenter, but you can always melt milk chocolate (for a sweet glaze) or melt semi-sweet chocolate and then add powdered sugar to your preference.

    Procedure

    1. Preheat oven to 350 degrees F (180 degrees C).  Toast almonds for 8-10 minutes or until lightly browned and fragrant.  Let cool and then chop coarsely.  Set aside.
    2. Reduce oven temperature to 300 degrees F (150 degrees C) and line a baking sheet with parchment paper. (I did not read carefully enough and actually baked them at 350 degrees and they still came out good :)
    3. In a small bowl lightly beat the eggs and extracts together.  Set aside.
      In the bowl of your electric mixer (or with a hand mixer or by hand) combine the flour, sugar, baking powder and salt.  Beat until blended (about 30 seconds).  Gradually add the egg mixture and beat until a dough forms, adding almonds about halfway through. On a lightly floured surface roll dough into a log about 14 inches (35 cm) long and 3 – 4 inches (8 – 10 cm) wide. Transfer log to the prepared baking sheet and bake for 30-40 minutes, or until firm to the touch (log will spread during baking).  Remove from oven and let cool on a wire rack for about 10 minutes. I just made one large 10-inch-long log and baked it for about 35 minutes.
    4. Transfer log to a cutting board and, using a serrated knife, cut log into slices 1/2 inch (1.25 cm) thick on the diagonal.   Arrange evenly on baking sheet.  Bake 10 minutes, turn slices over, and bake another 10 minutes or until firm to the touch.  Remove from oven and let cool.  Store in an airtight container.
    5. Melt semi-sweet or white chocolate and vegetable shortening in a small metal bowl placed over a saucepan of simmering water. Stir until melted and smooth. When melted, place chocolate into a parchment triangle or small plastic bag with one edge cut.  Pipe onto the biscotti in a decorative pattern.  Alternatively, you can dip or spread with a small metal spatula one side of the biscotti with chocolate and let dry on a clean baking sheet. This is what I did with my melted semi-sweet chocolate.

    I hope you enjoy the recipe and give it a try. It’s really quite good and if you’re looking to impress your boss or coworkers at work, then this will be a good hit for all those morning coffee drinkers. Have fun and enjoy talking over your cup of joe. :) As always, feel free to leave a comment if you made it! And if you want more biscotti recipes, go here.

    Chocolate Almond Biscotti Recipe

    Mmm...Just look at that perfect biscotti texture!


    Ah Hah! I’ve Found It: The Perfect Pound Cake Recipe!

    26 Jul

    I got a special request to make pound cake the other day and at first I wasn’t too thrilled at the thought. I’ve tried about two or three different versions of pound cake that didn’t turn out very well, like the “Kentucky Butter Cake“. (This one wasn’t too bad, but it turned out more like a bread than a cake so I was disappointed with it). Then you can stumble upon countless sour cream recipes, but I don’t like the taste of sour cream – yes, I know that you don’t really taste it in the baked goods, but I’m still not a fan – and I don’t have any at home – surprise, surprise. So, I’ve always found pound cake as a disappointing endeavor.

    Until now.

    Because by doing some research and surfing the web, I have found the perfect, moist, tender, sweet, pound cake loaf. I’m so tempted to call this a cake because of the soft texture, but I must say that it is denser than a sponge cake. However, unlike the Kentucky Butter ‘Cake’, this loaf is so much more lighter. It is the lightest pound cake I have found while still having that pound cake taste. In fact, it is also ‘lighter’ in another sense: it doesn’t have as much fat thanks to the addition of the yogurt!

    If you’d like to join me in my “Ah Hah!”-“Eureka!” moment, here’s my recipe adapted from here. (At first, I wasn’t too sure if I’d use this recipe simply found on About, but with two good reviews and only using 2 eggs, I’d figure that I might as well try it. And let me say, it was worth the try).


    Recipe for Moist Pound Cake Loaf

    Ingredients:

    • 1/3 cup butter, room temperature
    • 1/2 cup fat-free vanilla yogurt
    • 2 eggs
    • 2 cup sifted all-purpose flour
    • 1 teaspoon baking soda
    • 3/4 teaspoon salt
    • 2/3 cup nonfat milk
    • 1 teaspoon vanilla extract


    Procedure:

    1. Preheat oven to 325 degrees F.
    2. Grease and flour a loaf pan.
    3. First add butter into a medium bowl. Add in sugar while creaming it. It should be light and fluffy. This step is important because it ensures that the finished product is light and airy.
      Add in the vanilla yogurt and combine well. Add in eggs one at a time. Beat well after each addition.
    4. Sift all the dry ingredients together.
    5. Add the sifted ingredients to the butter mixture alternating with the milk. Start and end of the flour. Do not over mix.
    6. Pour batter into prepared loaf pan. Bake in preheated oven for 60 minutes, or until a wooden pick comes out of the center clean.

    Day Off = Shopping, Analysis, Baking: Poppy Seed Bread

    18 Jul

    With school over, I have had my first afternoon with nothing to do.

    Well, that’s not true. I did spend time eating a long lunch with a good friend and some shopping in San Francisco’s Japan Town. There’s a new store called Daiso that sells everything for only $1.50. I couldn’t believe it! Beautiful bowls (made in China, Taiwan, and Japan) for $1.50. Tart molds (made in Japan) for $1.50. Lanterns? $1.50. Candy, food, plant pots? $1.50. I bought a tart mold.

    Pretty nifty, ay? We’ll see how it does when I actually use it though. I’ll let you know and post pictures of the success or disaster. x__x

    After shopping and browsing, I headed home to turn on the computer and relax, something I hadn’t been able to do in 6 weeks, though my July 4th weekend was a weekend in heaven. :) With school and classes, I hadn’t much time to relax and enjoy my summer. But now, with school over, I have much more time to bake, relax, and work on my own pace. I had been taking an accelerated honors course this summer. Yes, I know, it was a crazy idea. But it paid off! I took my final today, which I honestly thought that I bombed – and I mean really bombed, like I didn’t know a single thing on there. With previous knowledge and some killer guessing skills, I managed to not only pass, but get a 94%! My overall grade? A 95%. *Takes a bow*. I am quite proud.


    Poppy Seed Cake

    After resting awhile, I decided that I would have a late dinner. It was just a bowl of soup from the can – not impressive, I know, but I had something else I was focusing. This brings me to my next topic: Poppy Seed Bread. (Though I made it into a cake).

    I couldn’t wait to try the new tart mold so I found a recipe. I had been craving a poppy seed bread for a while now, so I decided that no time was more perfect than now.

    The tart mold was a perfect mold! I’ve never used another tart pan but this was perfect. The mold was thick and seemed to be high quality. My cake didn’t burn and it was easily dented or bent.

    As for the poppy seed bread, it turned out pretty well. It was soft, moist, and sweet. It might have been better as an actual cake recipe or with some lemon, but it was good for a first try. I only made 1/3 of the recipe because I figured that even 1/2 would be too much for the 8 inch tart mold. I wasn’t even sure if it was going to work well, but it did. It worked out really well.

    Isn’t it just wonderful looking? And of course, it was so tasty,too.

    I suggest serving it was vanilla bean ice cream.
    The two compliment each other quite well.

    Recipe for Poppy Seed Bread
    Credit: All Recipes

    *When I made 1/3 of the recipe, I used the same amount of almond extract and baking soda. I also greased the tart pan with a small amount of vegetable oil. You can also flour it if you want though you might not need too.

    I hope you enjoy! :)